Checking entry proposal
How to check an entry proposal in the check screen and post it to your accounting package.
Written By Tess Hoogeboom
Last updated 6 days ago
Go to the Work queue and click the Check status next to a document. The Check screen opens with the entry proposal and the document. Go through the entry proposal from top to bottom and correct anything that is wrong.
1. Check the supplier or customer
First, check whether TriFact365 has found the right supplier or customer. There are three possible situations.
The supplier or customer has been found
You can continue straight away with the entry details.

The supplier or customer has not been found
The field is outlined in red. Type a number or name in the field to choose an existing supplier or customer. Does the supplier or customer not yet exist in your accounting package? Then click the pencil icon, enter the details and create a new one. Read more in Creating and modifying contacts.

TriFact365 proposes a new supplier or customer
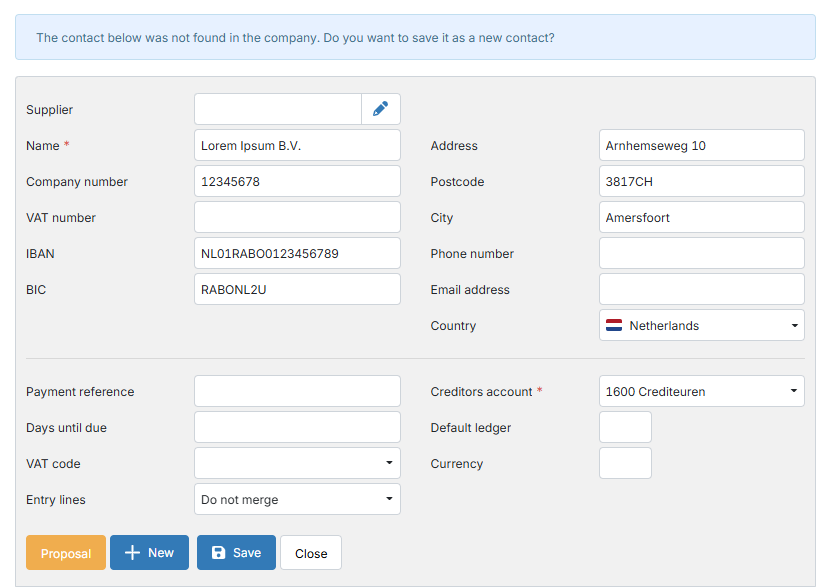
Is the supplier or customer not yet known in your company? Then TriFact365 can propose to create it. You then see this message:
2. Check the entry details
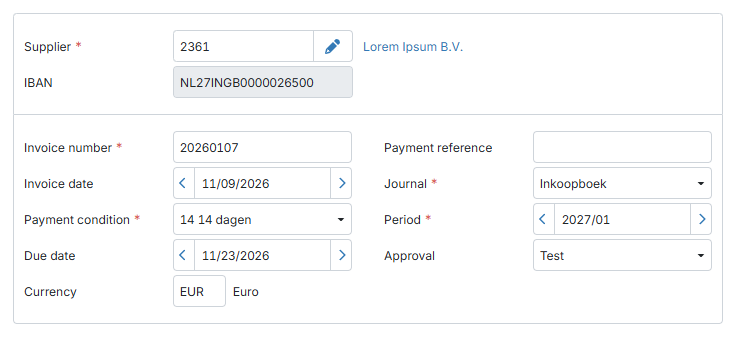
Then check the entry details, such as the invoice number and invoice date, and correct them if needed. Read more in:
Highlight recognised data in the PDF viewer
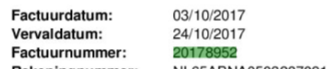
Click a field, for example Invoice number. In the PDF viewer, you then see where TriFact365 found the value.
Copy text from the PDF viewer
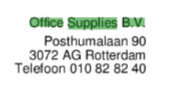
Would you like to use a word from the PDF in a field? Click the word in the PDF; it is highlighted in green. Then click in the field where the text should go.
Would you like to copy several words? Drag a box around the text until it is highlighted in grey.
3. Check the entry lines
Below the entry details are the entry lines. Add an entry line with the plus sign (+) at the end of the first line. Delete an entry line with the bin icon.
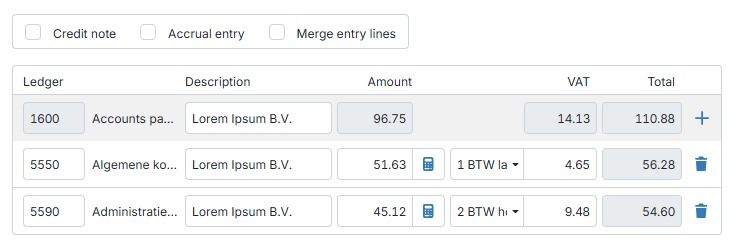
Credit note, Accrual entry and Merge entry lines
Above the entry lines, you see up to three checkboxes. Which ones you see depends on your accounting package.
Credit note: process the invoice as a credit note. Read more in Processing credit notes.
Accrual entry: create an accrual entry. The From and Up to fields are then added to the entry lines. Read more in Accrual entry.
Merge entry lines: merge entry lines with the same VAT rate into one entry line.
Ledger account and other dimensions
At the start of an entry line is the ledger account. By default, it comes from the master data of the supplier or customer. Change it by typing a different number or description.
Would you like to post to other dimensions as well, such as a cost centre or cost unit? Turn them on in the display options. Read more in Display options.
Description
The Description field shows the name of the supplier or customer by default. In the company settings, you can set a different description using labels. Read more in Set default descriptions for invoices.
Amounts and VAT codes
Next is the amount excl. VAT. With the selected VAT code, TriFact365 calculates the VAT amount and the total. Adjust the amounts if needed. Read more in:
How does TriFact365 determine the VAT code?
A default VAT code can be set for the supplier or customer. TriFact365 uses it on the entry lines with the same VAT rate, also if the entry proposal has several entry lines.
If no default VAT code is set, the VAT code comes from the recognition.
4. Add a comment
If needed, type a comment in the box below the entry lines. After posting, your comment appears in the History on the right of the screen.

For some accounting packages, you can send the History as an extra PDF with the entry. Read more in Send audit trail with the entry.
5. Post
Click Send. TriFact365 first checks whether the entry is complete. If it is, you go straight to the next document. The entry is sent to your accounting package in the background.
Posting failed?
If posting fails, you see a message below the menu bar with the reason. The document is then back in the Work queue with the status Check. Solve the problem and post again.
Do you use approval? Then the entry only goes to your accounting package after approval. If the accounting package rejects it then, read Documents with the status Unposted.
6. Other features
Keyboard shortcuts: process invoices even faster with the keyboard. Read more in Keyboard shortcuts.
Update master data: have you changed master data in your accounting package? Then update it in TriFact365 as well. Read more in Update master data.
Display options: turn dimensions on or off and change the layout of the screen. For example, place the document on the left, or the entry lines full width below the document. Read more in Display options.
Frequently asked questions
Ledger accounts or suppliers and customers are not shown (any more). What should I do?
Ledger accounts or suppliers and customers are not shown (any more). What should I do?
Sometimes the master data is not (or no longer) available when you check an entry proposal. For example, you cannot choose existing suppliers or ledger accounts. Read how to solve this in Error message: No results found.
Related articles
Was this helpful?
Still need help? Ask the team